
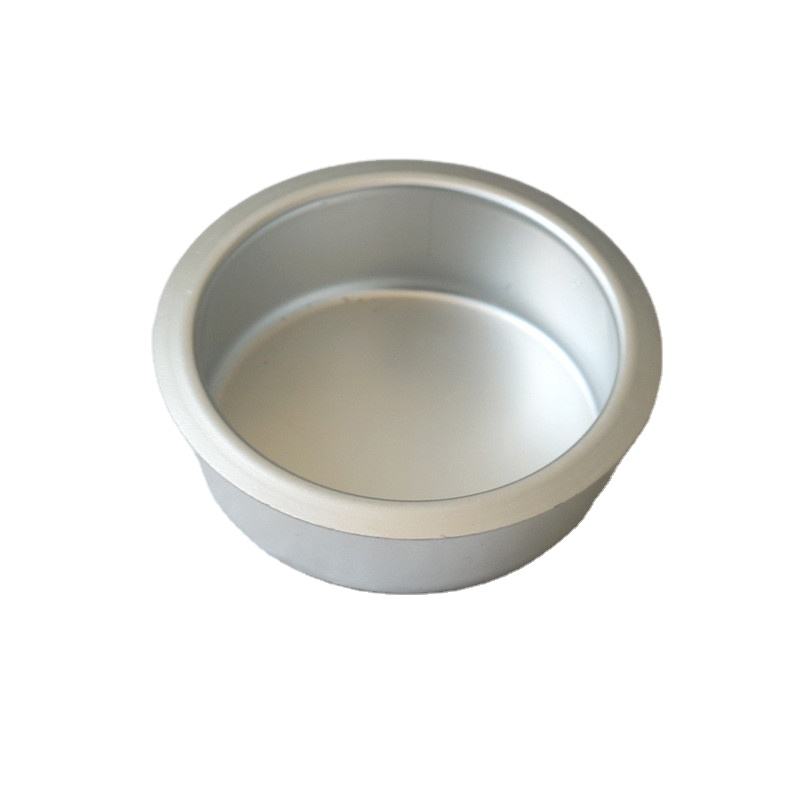
The Aluminum Deep Drawn Round Cup with Rolled Rim is a straight-walled cup whose only dressed feature is a rolled lip at the mouth – but that lip is the whole commercial point of the part, because a rolled rim is safe to handle, stacks cleanly, and seals against a gasket without a separate ring. The work below is about drawing the cup straight and then rolling the rim without wrinkling the very lip you just paid to form.
Setting the cup wall and base ratio before the draw
A round cup is defined by two numbers before anything else: the draw ratio (blank diameter to cup diameter) and the wall-to-base ratio. For an 80 mm outside-diameter cup drawn from 1.0 mm 3003, we blank at about 132 mm, giving a draw ratio of 1.65, which is comfortably inside the 2.0 limit for a single-stage aluminium draw. The depth is set to 60 mm, so the wall-to-base ratio is 60:1.0 – deep enough to need a second redraw but not so deep that the base pinches. We redraw once to set the wall at 0.95 mm and the base at 1.0 mm, and the difference is intentional: the base stays at stock thickness because it is not thinned in a cup draw, while the wall loses a little to the ironing in the redraw.
The punch and die radii at the base corner are opened to 4x thickness, because in a cup the corner radius is where the wall either flows or cracks. Closing that radius to save a gram of material is the fastest way to get a split at the bottom of the wall on every tenth part.
- Draw ratio 1.65 on 1.0 mm 3003; redraw once to set the wall at 0.95 mm.
- Base held at stock thickness; wall thinned slightly by the redraw ironing.
- Base corner radius 4x thickness; never close it to save material.
Between the draw and the redraw we anneal the cup at 350 degrees for an hour when the wall shows work-hardening beyond a 12 percent reduction, because 3003 that is drawn twice without relief cracks at the corner on the second stage. For cups drawn once only, no anneal is needed and we skip it to keep the lead time down. The redraw die is sized 0.05 mm larger than the first-stage cup outside diameter so the wall irons rather than re-draws, which is what sets the uniform 0.95 mm wall instead of leaving it lumpy.
Rolling the rim after forming without wrinkling the lip
The rim is rolled after the cup is trimmed to length, on a dedicated roll-forming head, and the sequence matters. We trim the mouth square to +/-0.1 mm first, because a crooked trim makes the rolled rim lopsided and the cup reads as out of round even when the body is fine. The roll head then turns the lip in over a 3 mm radius using a mandrel inside the cup, so the thin wall cannot collapse as the rolls close. The roll is set to leave a 1.5 mm stand-up height on the rim – enough to protect the edge and to locate a lid, not so much that the rim work-hardens and cracks on the next bend.
Rolling speed is held low on aluminium, because rolling too fast heats the lip locally and the rim takes a permanent wave. We cool the rolls on long runs so the 3003 does not creep, and we back the top roll off 0.01 mm per 800 parts as the rolls wear.
- Trim the mouth square to +/-0.1 mm before any rolling.
- Roll over a 3 mm radius on an internal mandrel at low speed; cool the rolls on long runs.
- Back the top roll off 0.01 mm per 800 parts to hold the stand-up height.
Aluminium grade choice for a drawn and rolled cup
3003 is again the workhorse for a rolled-rim cup: it rolls without cracking, draws in two stages, and anodises to a clean lip. We use 5052-H32 where the cup holds a liquid or sees condensate, because the rim is exactly the feature that gets handled and dinged and 5052 resists the resulting corrosion better. We avoid 6061 unless the wall is 1.5 mm or more, since its rolled rim tears at the crest on thin stock.
Finish is usually a clear or hard anodise at 10-15 microns, and we anodise after rolling so the rim crest – the thinnest, most exposed part – gets full coverage. Anodising before rolling leaves the freshly rolled crest bare, which is the one place a cup actually corrodes.
- 3003 for general cups; 5052-H32 where the rim is handled or washed.
- Anodise after rolling so the crest is covered, not before.
- Hard anodise 12-15 microns where the lip takes abuse.
Holding the rim diameter and cup concentricity
The rim diameter is the cup’s sealing and stacking feature, so it is machined to +/-0.03 mm even though the cup is drawn. Concentricity of the rim to the cup axis is held to 0.05 mm TIR, measured on a CMM at first article and then checked in production with a ring gauge that the cup must pass over the rim but not rattle on. The cup outside diameter below the rim is allowed +/-0.1 mm as-drawn because it only locates in a loose holder; the rim is the precision feature.
Wall thickness variation around the circumference is held to 0.05 mm because an uneven wall rolls into an uneven rim – the lip stands up higher on the thin side and lower on the thick side, and the cup will not seal flat. We map wall thickness on first article and sample it, because uneven wall is the hidden cause of a rim that will not seat.
- Rim diameter machined to +/-0.03 mm; concentricity 0.05 mm TIR.
- Wall thickness variation held to 0.05 mm around the circumference.
- Ring-gauge the rim every run; CMM the wall map on first article.
The wall map is taken at eight points around the circumference at the mid-height of the cup, because that is where redraw ironing is least uniform, and any point outside the 0.05 mm band is traced back to the redraw die clearance rather than blamed on the stock. We have found that a worn redraw die opens the wall on one side first, and the ring gauge catches the resulting rim runout long before a customer would see a sealing problem.
Why rolled rims split and how we keep the lip intact
A rolled rim splits at the crest for three reasons, and the fix is different for each. Too-tight a roll radius on thin stock stretches the crest past its limit – open the radius. Too fast a roll speed heats and work-hardens the lip mid-run – slow down and cool the rolls. And a trim that left the mouth below the roll’s engaged length rolls air and folds the lip instead of turning it – trim to length and re-zero the head. We keep a cut lip from each failure mode on the reference board so the operator matches the split before changing the setup.
The second failure is a wavy rim from uneven wall, covered above; the third is a rim that cracks after anodise because the crest was thinned below 0.7 mm in the roll. Our acceptance limit is a crest thickness of 0.7 mm minimum, checked on the first article with a ball micrometer, and any setup that rolls below it is rejected before the run.
- Match any split rim to the reference board: radius, speed, or trim length.
- Hold crest thickness to 0.7 mm minimum; ball-micrometer it on first article.
- Slow the roll and cool the rolls if the lip waves mid-run.
How we verify a rolled-rim cup on the line
A rolled-rim cup is verified mostly with gauges on the line because the draw is stable and the rim is the only feature that can go wrong late. The first article carries the evidence; the line check keeps it honest.
- First article: CMM on rim diameter and concentricity, wall-thickness map, crest thickness by ball micrometer, and a material certificate for the aluminium grade.
- Production: ring gauge on the rim every run, wall-variation sample, and a visual on the lip for waves or splits on the first and last part.
- Shipment file: dimensional report, material cert, and the anodise thickness record travel under your part number.
Tooling – the draw die, the trim and the roll head – is built and held in our own toolroom against your part number, with the roll-head setting archived by hit count so the rim stand-up height is reproduced on reorder. A reorder is a press cycle and a ring-gauge pass, not a new development.
Draw ratio, wall thinning, radii and trim — the design decisions behind a part like this are worked through with numbers in our deep drawn covers guide, and the Precision Deep Drawn Parts pages collect the rest of the family.
Specifications
| Item | Aluminum Deep Drawn Round Cup with Rolled Rim |
|---|---|
| Brand | AUNOV |
| Designing | A drawing file or a physical sample starts the review, the quotation comes back with a manufacturability review attached. |
| Tooling | Every die designed and built in our toolroom, held and maintained under your part number. |
| Samples | First-article samples ship with dimensional data and material certs. |
| Materials | Stock for this part leads with aluminium, alongside carbon steel (SPCC / DC01), 304 / 316 stainless steel, brass and copper, with grade selection confirmed at drawing review. |
| Surface finish | Surface treatment per the drawing: plating, e-coat, powder coating, anodising, passivation, selected against the drawing requirement. |
| Processing | Deep drawing in stages, in-line annealing where needed, then pierced and machined in house. |
| Equipment | On the press side, 5-250 T mechanical and 250-500 T hydraulic; CNC turning centres and a climate-controlled CMM room complete the floor. |
| Tolerance | +/-0.1 mm as-drawn, machined features held to +/-0.03 mm. |
| Delivery terms | FOB is standard; DDP offered for EU and US, payment T/T or L/C, D/P for repeat accounts, call-off scheduling supported. |
Frequently Asked Questions
Which two numbers define this cup before anything else?
The draw ratio and the wall-to-base ratio. Everything else follows from them, which is why we settle both at the blank development stage rather than discovering them once tooling exists.
Why does the base finish thicker than the wall?
That difference is intentional rather than uncontrolled. The base is not thinned in a cup draw, so it finishes at around stock thickness, while the wall loses a little to the ironing action of the redraw. A base thinner than the wall would simply move the weak point to the wrong place.
Why does the corner radius have to be opened up?
The corner at the base is where the wall either flows or cracks. We open the punch and die radii there to several times the material thickness, because closing that radius to save a gram of material is the fastest way to get a split at the bottom of the wall on a fraction of the parts.
What makes a rolled rim wrinkle or split?
Rolling is done after forming, so it is working metal that has already been work-hardened by the draw. The curl has to be taken gradually enough that the lip does not buckle, and the rim diameter and its concentricity are then checked specifically, because the rim is the feature that has to stay intact.
Related Products


Request a Quote for This Part
Send a drawing or sketch — get material advice, tooling cost and a per-piece price within 24 hours (working days).